
Drywall Repair From Nail Holes to Large Patches
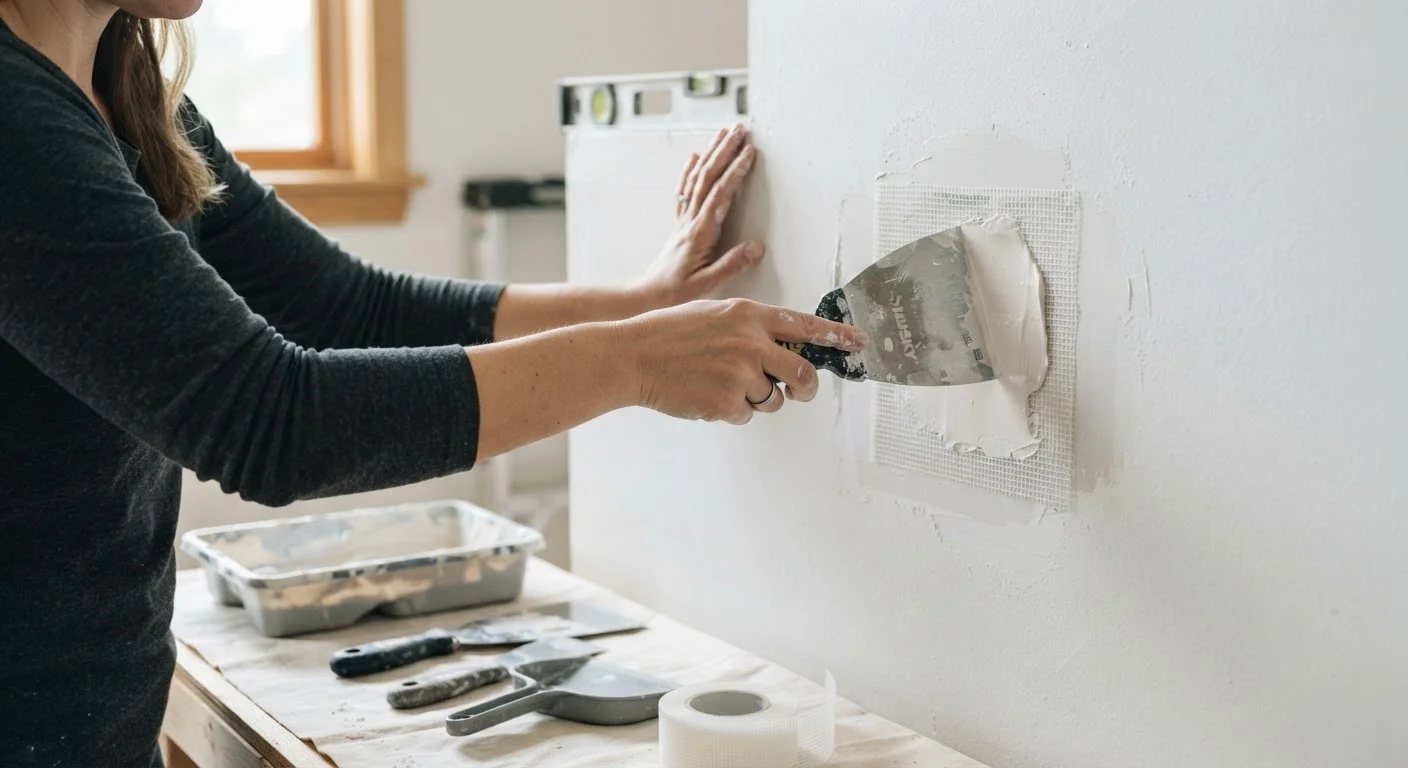
Photo credit: AdvisorHQ.net | Informative Website
In this article
A practical walkthrough of drywall repair techniques, from quick cosmetic fixes to cutting out and replacing damaged sections — with safety notes throughout.
Key Takeaways
- Nail holes and small dings can be fixed in under an hour with spackling compound and a putty knife.
- Medium holes (up to 6 inches) require a backing patch or adhesive mesh to support the repair compound.
- Large damaged sections need a proper drywall cut-out, wood backing, and a new drywall piece.
- Feathering joint compound in multiple thin coats produces the smoothest, most invisible finish.
- Proper sanding and priming before painting are essential for a seamless, lasting result.
- Electrical wiring and plumbing may be behind walls - always check before cutting.
Understanding Drywall Damage
Drywall - also called wallboard or gypsum board - is the standard wall and ceiling surface in most American homes. It consists of a gypsum plaster core sandwiched between two layers of paper. Because gypsum is relatively brittle, it is susceptible to dents, holes, and surface tears from everyday life: door handles, furniture moves, settling cracks, and the accumulated history of picture-hanging over the years.
The good news is that drywall is also one of the more forgiving materials to repair. Whether you are dealing with a handful of nail holes left by the previous owners or a fist-sized hole from a doorknob impact, the core process is the same: fill the void, support it if needed, blend the surface, and finish cleanly. Sizing up the damage accurately before you start is the single most important step - it determines which approach and materials you will need.
Putty knife (3-6 inch)
Applies and smooths spackling compound or joint compound for small to medium repairs.
Drywall joint compound (all-purpose)
The primary filler material for patching holes of all sizes.
Self-adhesive mesh patch
Provides a bridging surface to support compound over medium-sized holes.
Drywall saw or utility knife
Cuts out damaged drywall sections cleanly when a full patch replacement is needed.
Drywall screws and 1×3 or 2×4 wood backing
Provides structural support for a new drywall piece in large-hole repairs.
Sanding sponge or 120-grit sandpaper
Smooths dried compound between coats and before priming.
Primer
Seals the patched area so paint adheres evenly and sheen matches the surrounding wall.
Stud finder with AC wire detection
Locates studs and hidden wires before any cutting begins.
What You Will Need
The tools required scale up with the size of the repair. Small cosmetic fixes need almost nothing beyond a putty knife and a small container of spackling. Large structural patches require a handful of additional items. Review the full tool list below, then purchase or gather only what your specific repair calls for.
What you will need
Having everything staged before you begin avoids mid-project trips to the hardware store, which can interrupt drying times and affect the final finish quality.
Check for Wires and Pipes Before Cutting
Before cutting into any wall, use a stud finder with AC detection or a wire-scanning tool to check for electrical wires, plumbing, or gas lines behind the drywall. Cutting into live wiring or a pipe can cause serious injury or costly damage. If you are uncertain about what lies behind the wall, consult a licensed electrician or plumber before proceeding.
Step-by-Step Repair Instructions
Work through the steps below in order, skipping steps that do not apply to your repair size. The key to professional-looking results is patience: letting each coat of compound dry completely before adding the next prevents shrinkage cracks and uneven texture.
Assess the damage and gather materials
Determine the size and type of damage before reaching for any tools. Categorize your repair:
- Small (nail holes, dents up to ½ inch): Spackling compound only.
- Medium (½ inch to 6 inches): Adhesive mesh patch plus joint compound.
- Large (over 6 inches): Cut-out replacement with wood backing.
Gather all tools and materials before starting so the project flows without interruption.
Repair nail holes and small dings
Using a putty knife, press a small amount of lightweight spackling compound firmly into the hole, overfilling it slightly. Draw the knife across the surface at a shallow angle to scrape away excess, leaving the compound flush or just barely proud of the wall. Let it dry fully - white compound turns transparent when ready. Sand lightly with a fine sanding sponge until smooth to the touch.
Apply a mesh patch for medium holes
Clean the edges of the hole, removing any loose paper or crumbled drywall. Center a self-adhesive fiberglass mesh patch over the hole and press it firmly against the wall. Using a 6-inch drywall knife, apply a coat of all-purpose joint compound over the entire mesh, spreading it outward in smooth strokes. Feather the edges - meaning taper the compound so it blends gradually into the surrounding wall surface.
Allow the first coat to dry completely (typically several hours, or overnight). Apply a second thin coat, extending slightly beyond the first. A third finishing coat may be needed for a seamless look. Sand between coats once dry.
Cut out and replace a large damaged section
Use a stud finder to locate the nearest studs on either side of the damage. Mark a rectangle that extends to the center of each adjacent stud, so your replacement piece has a solid nailing surface on both sides. Score the lines with a utility knife, then cut through with a drywall saw. Remove the damaged piece.
Cut 1×3 or 2×4 wood backing boards and secure them vertically inside the opening at the left and right edges using drywall screws driven through the existing wall. Cut a new piece of drywall to fit snugly in the opening and attach it to the backing and any stud faces with drywall screws spaced roughly 8 inches apart. Apply mesh tape or paper tape over all seams, then build up the repair with joint compound using the same feathering technique as for medium repairs.
Sand the repaired area smooth
Once the final coat of compound is fully dry, sand the entire repaired area using 120-grit sandpaper or a sanding sponge. Work in long, light strokes, checking frequently by holding a work light at a raking angle to reveal any ridges or low spots. Avoid over-sanding in one spot, which can dig into the paper facing of surrounding drywall. Wipe away all dust with a slightly damp cloth and allow the wall to dry.
Prime and paint the patch
Apply a coat of drywall primer (or PVA primer) to the entire repaired area. Joint compound is highly porous and will absorb paint unevenly if left unprimed, causing a visible dull spot - sometimes called flashing - even after multiple paint coats. Let the primer dry per the manufacturer's label, then paint to match the surrounding wall. Applying paint with a roller rather than a brush often blends texture better on flat and eggshell finishes.
Drywall Dust Is a Respiratory Hazard
Sanding joint compound and drywall generates fine dust that can irritate airways and eyes. Always wear an N95 or higher-rated dust mask and safety glasses during sanding. Work in a ventilated area and consider laying down drop cloths to contain cleanup.
Finishing Tips for an Invisible Repair
Even a technically sound patch can look obvious if the finishing stage is rushed. The most common issue is texture mismatch - the surrounding wall may have a light orange-peel or knockdown texture applied during original construction, while the patch is perfectly flat. Before painting, examine the existing wall finish in raking light. If you see a light texture pattern, you can approximate it by rolling a thin coat of thinned joint compound over the primed patch and stippling or dragging it lightly before it dries. Practice on a scrap piece of drywall or cardboard first.
Lighting angle matters during inspection. Hold a work light close to the wall surface and move it slowly - any ridges, low spots, or edge lines will cast a shadow that is invisible under normal overhead lighting. Address those areas with a final skim coat of compound before priming.
For a truly seamless result on larger repairs, consider skim-coating a slightly wider area - about 12 to 18 inches beyond the patch boundary - so the transition is gradual enough to disappear once painted. This takes more time but is the approach professional drywall finishers rely on.

Author
Home & Garden Editorial Team
Home & Garden Editorial Team is the collective byline for our editorial team and contributor network. Articles published under this byline or an editorial pen name are researched, written, and reviewed according to our editorial standards for clarity, consistency, and independence before publication.
View all articles →